

Simple scrapbooking for beginners! Make your first layout based on seven simple steps.
Learn simple scrapbooking here, but first of all; you need to have fun! Scrapbooking is a wonderful hobby in which you create with your hands and shape your thoughts into visible art nourishedcreations.
You need not buy you cool expensive tools and accessories for creating a professional scrapbook layout. You can start with just a few simple things!
Step by step guide Scrapbooking for beginners!
Step 1 Simple Scrapbooking
Scrapbook for beginners, accessories and tools;
- Adhesives needs to be acid-free. Photo fix in the form of small square pieces of tape, is the easiest way to start on a beginner. We strongly recommend 3L Mounting Squares.
You need not buy you cool expensive tools and accessories for creating a professional scrapbook layout. You can start with just a few simple things!
Step by step guide Scrapbooking for beginners!
Step 1 Simple Scrapbooking
Scrapbook for beginners, accessories and tools;
- Adhesives needs to be acid-free. Photo fix in the form of small square pieces of tape, is the easiest way to start on a beginner. We strongly recommend 3L Mounting Squares.
- Paper 12x12 ", acid-free, 2 - 4 colors that provides support for your selected photos and their colors. Solid cardstock is easier to work with when you are a beginner, but you should nevertheless still consider buying some patterned papper.

- Archival safe album 12x12” and plastic pockets that both maintains and protects your layouts is a wise initial investment. Keep in mind that you get an album that matches your needs, based on the number of photos, journaling and decorations that you will use on your layouts.

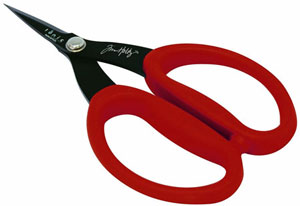
- Paper cutters 12 "tall to cut the background paper, cut/crop your photos, etc. Paper Cutters works much better and is easier to use compared with scissors when it comes to fix straight lines. However, you can do without a cutter if you just intend to test scrapbooking!

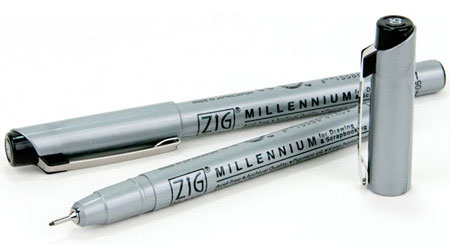
- Black journaling pen acid-free. We recommend zig pens that are resistant to fading, waterproof and permanent, so called pigment ink pen. You can read more about different pens here...
- Embellishment, try a brainstorming session, you will be amazed at the results! Otherwise, you can choose between stickers, stickers, alphabet lettersr, rub-ons, charms, ribbons, eyelets and much more.

Step 2 Simple Scrapbooking
Take a closer look at your photos, look for a theme you want to build. It can be anything from vacationing family, baby, wedding, family, friends, and much more.
Select 5-10 photos you want to include in your scrapbook. These photos should really tell the story that you want to get up!
Now, look at your photos and ask yourself if there are any distracting elements that should be cut? This is called trimming / cutting (Cropping) a photo.
Example; if you have too much water on a beach photo, so you might consider cutting away a part of it.
The next step is to figure out which of your photos will sit on the so-called focal point (the photo as a natural way will be considered a main photo in your layout). Place your photos on the layout, with the main photo that stands out a bit in the middle. Schedule little surface for journaling and titles, if desired.
Step 3 Simple Scrapbooking
Go on to some journaling. Naming your topic, write down the year and month the photo was taken.
- Why was this event / moment so important that you took a photo? Write down!
- What is it you see in the photo? Write down!
- Why are all these people gathered together? Write down!
Go on to some journaling. Naming your topic, write down the year and month the photo was taken.
- Why was this event / moment so important that you took a photo? Write down!
- What is it you see in the photo? Write down!
- Why are all these people gathered together? Write down!
I think you understand the methodology now ... The answer to such questions gives your photos the story that they deserve. Make sure to write down all your answers so you can use it as input to step 6 below.
Step 4 Simple Scrapbooking
A photo mat (Matte, Matting) bakom ditt foto. behind your photo. Just be sure to leave room for journaling when you decide the size of the photo mat. Please try with colored paper.
Also try to match the color of the photo mat with one of färgena in your photo!
A photo mat (Matte, Matting) bakom ditt foto. behind your photo. Just be sure to leave room for journaling when you decide the size of the photo mat. Please try with colored paper.
Also try to match the color of the photo mat with one of färgena in your photo!
Step 5 Simple Scrapbooking
Now you have come such a long tatt everything is cut to size, arranged and any photo mats are ready. Glue now the whole thing!
Now you have come such a long tatt everything is cut to size, arranged and any photo mats are ready. Glue now the whole thing!
Step 6 Simple Scrapbooking
Write your journaling, perhaps in combination with alphabet stickers or rub-ons.
Write your journaling, perhaps in combination with alphabet stickers or rub-ons.
Step 7 Simple Scrapbooking
Take a step back, look on your fabulous creation! Ask yourself if this layout expresses what you want to produce? If you still have room for decorations, so maybe you could do something extra, but be careful, do not let anything take the focus away from your pictures!
Take a step back, look on your fabulous creation! Ask yourself if this layout expresses what you want to produce? If you still have room for decorations, so maybe you could do something extra, but be careful, do not let anything take the focus away from your pictures!
The first simple steps in scrapbooking've learned:
- How do you choose the photos
- What simple basics with necessary?
- Which base tools you need
- How and what are cut off from eg photos?
- How you are using photo rug adds color.
- How to make basic journaling and leave space for it in your layout
- To scrapbooking for beginners does not have to be expensive!
- How do you choose the photos
- What simple basics with necessary?
- Which base tools you need
- How and what are cut off from eg photos?
- How you are using photo rug adds color.
- How to make basic journaling and leave space for it in your layout
- To scrapbooking for beginners does not have to be expensive!
