

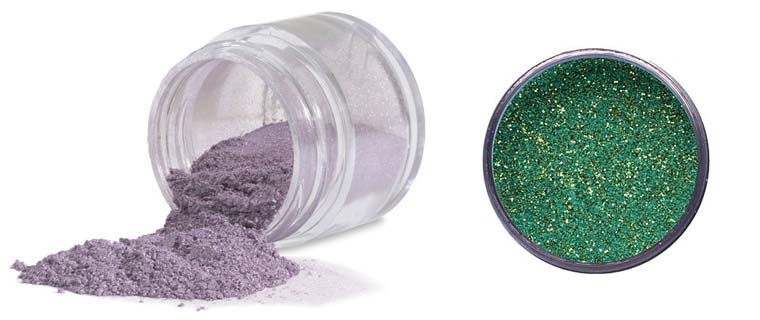
Like the glitter and glamor of your projects? Or do you like to create interesting textures? Then pigment and embossing powder something that you should learn to use! You simply create exciting details and textures in your work.
The difference between pigment and embossing powder is mainly in how you finally attach it in your layout or card. Embossing powders need to be heat with a heat gun, while the pigment powder jams you add / mix with a little water.
1. The pigment powder is in a wide utbut of colors with different properties. One is metallic, others have bright colors. Many are gleaming! There are also two-tone that varies in hue depending on the angle you have, or any surface you applied the powder on. Others give so-called "interference effect" which means that when the powder is applied to eg a dark paper instead of a bright, so give it a completely different color.
Unlike dyes, as pigment powder is insoluble. You can read more about the pigment powder in Wikipedia and an interesting article here...
Some techniques of pigment powder
There are many different techniques to apply to achieve olkia types of appearances in your projects!
One example is to use porous mat paper with texture and sprinkle pigment powder on its surface. Begin then to spread out your powder on the surface using a dry brush. You work when the powder into the pores / structure. You must brush careful because the pigment powder is very volatile.
Excess powder, shake gently removed by using your fingers and gently tap the side of the paper. This method is called "Dry Dust" and is best suited for adding shimmering colors in the background of your project! When you are satisfied with the results, you need to fix the powder. If your pigment powder contains water-binding agents, such aktivear it by sparya on some water. Otherwise, you need to use some kind of fixation spray suitable for the pigment you used.
A completely different technique is to use a wet pen (or paintbrush, water brush) and adding water or a premixed solution. Also try to experiment with a damp duttare or the like. Remember never to dip the pen directly into the pigment can, but sprinkle a little powder on the side and use the pen there instead, then to paint what you have in mind. You can use both narrow pencils for detailed work and wider for the larger motives! This method is useful if you want to paint a stamped motif!
BumbleBees range of pigment powder can be found here...
Videos describing how to use the Ranger Perfect Pearls.
2. Embossing pulver
Heat Embossing (powder and the heat gun)
You can emboss with powder by applying heat with a special heat gun. This is a fantastic way to decorate your project with a personal touch, and not at all that difficult!
Here you must think about not applying heat close to your photos so that they are destroyed. To be completely safe so do not you put there pictures föränn you are done with embossing.
You need:
- Stationery and stamps
- An embossing ink pad, embossing pens and / or a wet ink pad *
- Your own choice of embossing powder **
- A heat gun designed for embossing
- Any unused paper to collect the embossing powder left over. (Recycled)
- A brush with thin fine point
* A note about inking pads;
Your stamp motives must be damp when you apply powder on the subject. An embossing ink pad has the property that it dries slowly and is therefore suitable for the purpose. You can also try using ink that dries slowly, but always test first so it works.
Embossing pens are perfect especially for words / phrases, letters and narrower lines, etc.
** A note about embossing powders;
There are many different characters by embossing powders; smooth, matte, distress, antique, etc. Common to all is a fine powder using any glue / sticky applied to a subject in which you are applying heat to melt the powder.
Types of embossing powders:
- Extra Fine, perfect for stamps with very details
- Regular, that you use as the base powder
- Ultra Thick (UTEE). to be used for large and "thick" motif
When you embossed a few times, you'll learn the powder size best suited to the different subjects that you have.
What embossing powder shall I buy first time ??
By starting with the colors black, silver and gold, so you cover probable in 80% of your project.
To begin with embossing powder and heat are not particularly expensive. in the long run. embossing powder is very affordable, and lasts a long time, and if you gradually increase to about 10 colors, you will cover most of your needs.
Some simple steps to emboss a motif:
1. Add ink (ink) on your chosen stamp motif and used with embossing pad. Stamp your subject.
2 Spread out your embossing powder generously to your stamped motif. Gather up the leftover powder using the leftover piece of paper. (This can subsequently be pouring back into the container)
Simply tap the back of your subject to get away more powder that is not jammed. You can also brush away with a fine brush, alongside your subject.
3. Now is the time to use the heat gun. Heat until you see that the powder begins to melt. Now you are ready! The result is a beautifully raised subjects that look as if you've spent a lot of time to create.
